Congratulations! 🎉
Assuming you’ve assembled your kit properly you should’ve seen an MLC Projects splash screen followed by a QR code taking you to the pervious page.
This means you’re now ready to start uploading your own code to the Seeeduino Xiao, the microprocessor in this case!

Installing OLED Display Libraries
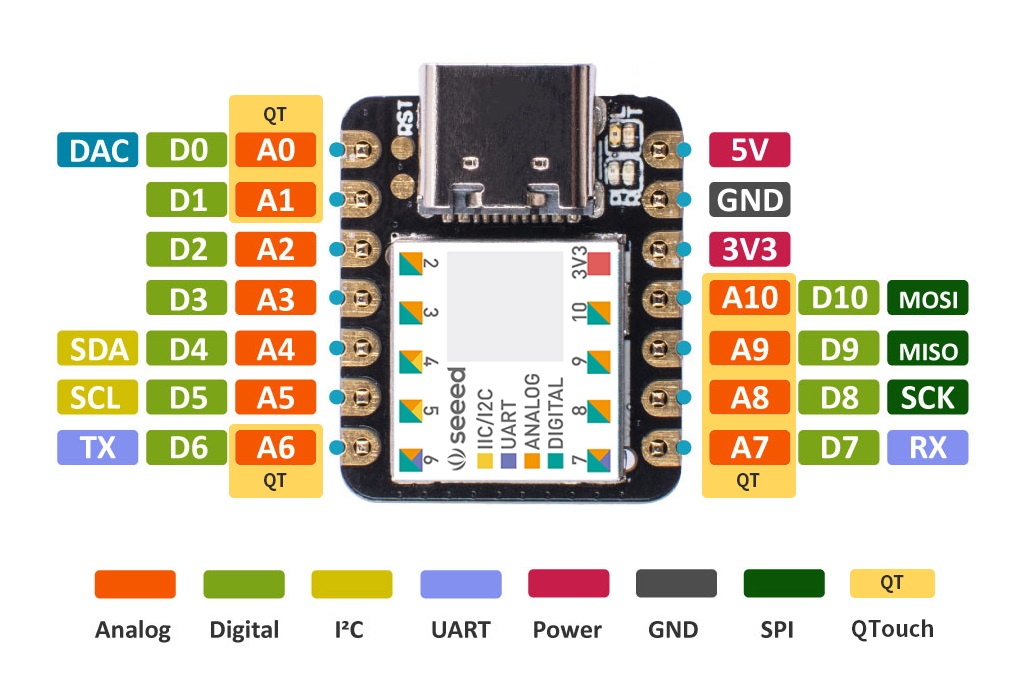
The screen receives data from the microprocessor via a transmission protocol know as I2C (I squared C). It operates using a clock pin (SCL – S Clock) and a data pin (SDA – S Data).
Upon every clock pulse we read the data pin, determine if its either high or low and therefore either a 1 or 0 being transmitted. This is managed by the built in “Wire” library which the graphics engine we’re going to install will utilise.
Tools ➜ Manage Libraries ➜ Search “ssd1306” ➜ Install the highlighted library
You will need to restart you IDE after installing.

Download Code Stubs
This will give you a starting ground to write your code, ready for upload!
Rotary Encoders
The video explains how a rotary encoder works and proceeds to code a solution for Arduino however see if you can come up with a solution of your own before seeing how they did it.
On your PCB schematic, we have the following connections:
| OUTPUT | PIN |
| RIGHT A (CLK) | 0 |
| RIGHT B (DT) | 1 |
| RIGHT Button (SW) | 2 |
| LEFT A (CLK) | 3 |
| LEFT B (DT) | 7 |
| LEFT Button (SW) | 8 |
Your Task:
Using the internet and other resources your goal is to code a program that reads from two rotary encoders and adds or subtracts to an x and y value appropriately then use the display.drawPixel(x,y,WHITE); function to draw it to the display, remember to use display.display(); to show any updates you’ve made to the display.
This is because the graphics library we’re using uses Double Buffering, updating an array of pixels stored in memory before sending the array to the display. This helps prevent flickering as the array is updated.
Also mess around with the button function of each encoder, perhaps add a pen up/down feature, or a clear function.
NOTE: Each input is an input pullup, meaning when the button is pressed the Seeeduino reads the button as LOW and otherwise HIGH. Also take a look into input de-bouncing, chances are you’ll run into it sooner or later.
Extension:
Move your code that reads from each encoder into a subroutine triggered by an interrupt so there’s no delay when changing the x and y value, then once the code has returned to its main space you can update the display!
All Done Here?
Any Questions: [email protected]